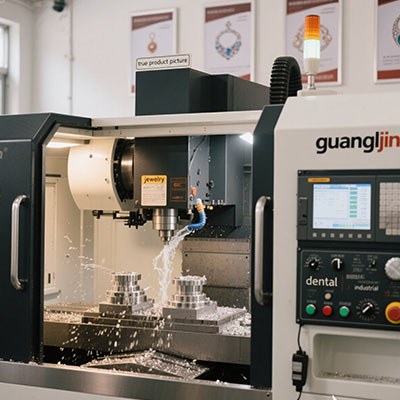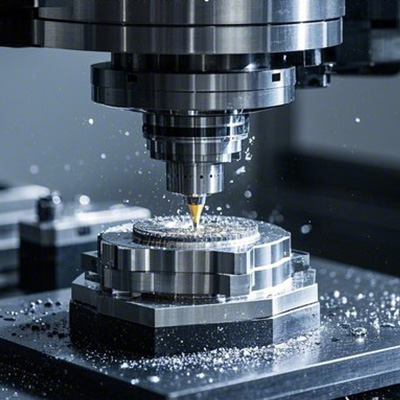
Custom decor pieces push a jewelry shop beyond standard bead shapes. A client wants a faceted bead with a textured surface. Another wants a carved pendant that matches a beaded strand. The shop needs a milling service that handles custom geometry without losing the elegance. This guide covers the beaded jewelry milling solutions for custom decor work.
The Custom Decor Problem: Shape and Surface Together
A standard bead is round with a straight hole. A custom bead may be faceted, carved, or textured. The milling service must produce the shape and the surface in one process.
Surface texture is the harder half. A carved bead with a rough surface looks unfinished. The tool must leave a finish that polishing can improve without erasing the detail.
Therefore, the custom decor process starts with the surface strategy. The tool path, the tool geometry, and the finish pass all decide whether the bead looks elegant or rough.
Custom Bead Shapes and Tool Paths
Faceted beads need flat cuts at precise angles. A ball end mill can rough the shape. A flat end mill finishes the facets. The tool path must follow the facet geometry precisely.
Carved beads need a different approach. A small ball end mill follows the carved surface. The stepover must be small enough to hide the tool marks. A roughing pass and a finishing pass keep the process efficient.
Textured beads use a patterned tool path. The tool moves in a defined pattern to create the texture. The depth and spacing of the pattern decide the visual effect.
Our team supported a jewelry shop in 2025 that milled a set of faceted custom beads. The shop used a two-pass strategy: a ball end mill for roughing and a flat end mill for the facets. The finish needed only light polishing. A single-pass strategy on the same beads left tool marks that required heavy polishing.
Comparing Two Custom Milling Approaches: Project A vs. Project B
| Parameter | Project A: Two-Pass Strategy | Project B: Single-Pass Strategy |
|---|---|---|
| Roughing tool | Ball end mill | Flat end mill |
| Finishing tool | Flat end mill for facets | Same flat end mill |
| Surface finish | Clean facets, light polishing | Tool marks, heavy polishing |
| Detail after polishing | Sharp, preserved | Blurred at edges |
| Scrap rate | 3.1% | 9.7% |
Project A used two passes and preserved the facet detail. Project B saved a pass and lost the detail in polishing. Elegant beaded jewelry rewards the finish strategy.
Workholding for Small Custom Beads
Custom beads are small and irregular. Standard vises do not hold them well. A custom fixture with a machined pocket holds the bead securely.
Wax or low-melt alloy can support thin beads during cutting. The support reduces vibration and prevents breakage. The support material melts away after the cut.
A rotary axis helps on carved beads. The bead mounts on the axis and the tool carves around the circumference. The axis must hold the bead steady and rotate precisely.
Research on micro-milling shows that workholding stiffness and tool runout dominate surface quality at small scales. Work published on micro-machining supports that finding. The custom decor service must control both.
Surface Texture and Finishing
Surface texture is the design element. A carved or textured bead must keep the texture through polishing. The cut quality decides how much polishing is needed.
A clean cut needs light polishing. A rough cut needs heavy polishing, which can blur the texture. The tool path and the finish pass must produce a surface that polishing can improve.
Tool marks show through polishing if they are deep. A light finish pass with a sharp tool reduces the polishing burden. The beaded jewelry milling service must plan the finish pass before the first cut.
Step-by-Step: Milling a Custom Bead for Beaded Jewelry
- Review the design for shape and texture. Note the facets, carvings, and surface pattern.
- Choose the roughing and finishing tools. Use a ball end mill for roughing and a flat end mill for facets.
- Plan the tool path with a small stepover. Hide the tool marks and preserve the texture.
- Mount the bead in a custom fixture. Use wax or low-melt alloy for thin beads.
- Cut a test bead and inspect under magnification. Check facet edges and texture depth.
- Adjust the finish pass if tool marks remain. Light passes reduce the polishing burden.
- Polish the test bead and check the detail. Confirm the texture survives polishing.
Matching Beads to a Strand
Custom decor pieces often match a beaded strand. The beads on the strand and the custom piece must look like a set. Size, shape, and surface finish must align.
Measure the existing beads before milling the custom piece. Match the diameter, the hole size, and the surface texture. A custom piece that looks different from the strand breaks the set.
The beaded jewelry milling service for custom decor is a system: shape, surface, workholding, and matching. Each layer supports the others. A shop that controls all four delivers custom pieces that look like part of the set.
Frequently Asked Questions
Can CNC milling produce custom bead shapes for beaded jewelry?
Yes. Ball end mills rough the shape and flat end mills finish facets. Carved beads use small ball end mills with a small stepover. A two-pass strategy keeps the surface clean.
How do I preserve surface texture through polishing on custom beads?
Cut cleanly with a light finish pass. A clean cut needs light polishing, which preserves the texture. A rough cut needs heavy polishing, which blurs the detail.
What workholding is best for small custom beads?
A custom fixture with a machined pocket or wax support. Wax or low-melt alloy supports thin beads and reduces vibration. A rotary axis helps on carved beads.
How do I match a custom beaded piece to an existing strand?
Measure the existing beads for diameter, hole size, and surface texture. Match those values on the custom piece so it looks like part of the set.
Why does a two-pass strategy matter for custom bead milling?
The roughing pass removes material quickly. The finishing pass produces a clean surface. A single pass often leaves tool marks that heavy polishing must remove, which blurs the detail.
Custom Beaded Jewelry Milling Checklist
- Review the design for shape and surface texture.
- Choose a ball end mill for roughing and a flat end mill for facets.
- Plan a small stepover to hide tool marks.
- Mount the bead in a custom fixture or wax support.
- Use a rotary axis for carved beads.
- Cut a test bead and inspect under magnification.
- Adjust the finish pass if tool marks remain.
- Polish the test bead and check the detail.
- Measure existing beads to match the custom piece.
- Log tool paths and parameters for repeat orders.