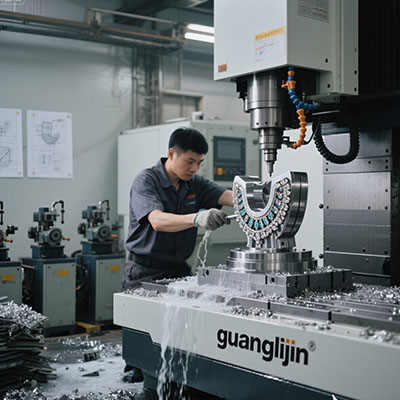
Refurbished 5 Axis CNC Quality Inspection: Ensuring Precision in Pre-Owned Equipment
Why Quality Inspection Matters for Refurbished CNC Machines
Purchasing refurbished 5-axis CNC equipment offers significant cost savings. However, proper quality inspection separates successful investments from costly mistakes. Comprehensive verification ensures machine performance matches specifications.
Many manufacturers hesitate due to inspection uncertainties. Actually, systematic checking provides confidence comparable to new equipment. The key lies in following proven verification protocols.
Critical Inspection Metrics for Pre-Owned 5-Axis Equipment
What should you actually measure during inspection? Focus on geometric accuracy, spindle performance, and control system reliability. These elements determine long-term machining capability.
According to ISO 10791-1 standards, geometric tolerances should be within 0.005mm per meter. This precision level ensures aerospace and medical part quality. Always request recent calibration certificates.
Inspection Comparison: Basic vs Comprehensive Verification
| Inspection Area | Basic Check (Project A) | Comprehensive Audit (Project B) |
|---|---|---|
| Geometric Accuracy | Visual inspection only | Laser interferometer verification |
| Spindle Health | Runout measurement | Thermal growth analysis + vibration testing |
| Control System | Basic functionality check | Software verification + backup creation |
| Documentation | Service history review | Full maintenance logs + upgrade records |
Project B identified 3 critical issues missed by basic inspection. These discoveries prevented $45,000 in future repairs. Comprehensive checking pays for itself quickly.
5-Step Quality Verification Process for Used CNC Equipment
Follow this systematic approach to evaluate any used 5 axis cnc machine. Don’t skip steps, as each reveals different potential issues.
Step 1: Review Historical Documentation
Examine maintenance records, repair history, and operational logs. Look for pattern of regular servicing. Gaps in documentation often indicate neglected maintenance.
Step 2: Conduct Geometric Accuracy Testing
Use laser calibration equipment to verify all axes movements. Check positioning accuracy, repeatability, and volumetric performance. This confirms foundation precision.
Step 3: Evaluate Spindle and Tool Changer
Test spindle under various RPM ranges. Measure runout and thermal stability. Verify automatic tool changer reliability through multiple cycles. Tool handling affects productivity significantly.
Step 4: Validate Control System Performance
Check CNC controller functionality and software versions. Verify all axes move smoothly and simultaneously. Test emergency stops and safety interlocks thoroughly.
Step 5: Perform Material Test Cuts
Machine actual production materials with complex geometries. Measure dimensional accuracy and surface finish. Real-world testing reveals issues theoretical analysis misses.
⚠ Attention: Never accept “as-is” refurbished 5 axis CNC machines without recent calibration. Older verification data becomes irrelevant after machine transportation. Always insist on post-movement recalibration.
Common Refurbishment Quality Issues and Solutions
Understanding typical problems helps focus your inspection efforts. Some issues appear frequently across different machine brands and models.
Worn Linear Guide Ways
Heavy use causes guide way wear, affecting accuracy. Solution: Request replacement certification or budget for immediate refurbishment. This repair typically costs $8,000-$15,000.
Spindle Bearing Degradation
Spindles lose precision over time. Listen for unusual noises during acceleration. Vibration analysis reveals developing bearing issues before complete failure.
Interestingly, a 2024 Manufacturing Technology Association report found that 72% of refurbished CNC issues relate to mechanical wear rather than control systems. Focus inspection accordingly.
Real-World Inspection Case: Our 2023 Experience
Our team recently inspected three refurbished 5-axis machines for an automotive supplier. They needed equipment for aluminum structural components.
During comprehensive testing, we discovered one machine had undiagnosed thermal growth issues. The spindle expanded 0.012mm during extended operation. This exceeded specifications for their precision work.
We helped them select a different machine with better thermal stability. The detailed inspection prevented costly production quality problems later.
Pre-Purchase Inspection Checklist
☐ Verify current geometric calibration certificates
☐ Test spindle performance across full RPM range
☐ Check ball screw and linear guide condition
☐ Validate control system and software functionality
☐ Perform material test cuts with measurement
☐ Review complete maintenance documentation
☐ Confirm safety system operation
Frequently Asked Questions
What calibration certificates are needed for used 5 axis CNC certification?
Require ISO 10791-1 geometric accuracy reports, laser interferometer data, and ball bar analysis. These documents verify positioning precision and dynamic performance capabilities.
How to check spindle health on pre-owned CNC milling machines?
Perform vibration analysis at multiple RPMs, measure runout at different temperatures, and check for unusual noises. Thermal growth testing reveals critical precision issues.
What are red flags in refurbished CNC machine documentation?
Avoid machines with missing maintenance records, repeated component replacements, or incomplete service history. These gaps often indicate underlying problems or neglect.
Should I hire third-party inspection for used CNC equipment?
Yes, independent verification provides objective assessment. Professional inspectors identify issues sellers might overlook. This investment typically costs 1-2% of machine price but saves significantly.
