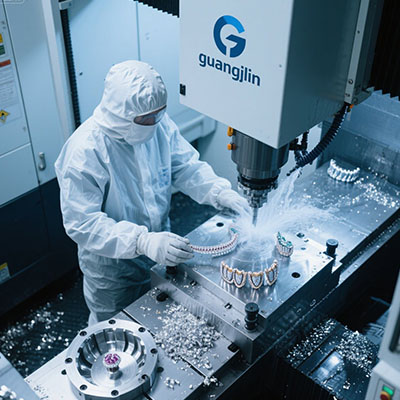
Precision CNC 3 Axis Machining for Aerospace Parts
Why Aerospace Manufacturing Demands Extreme Precision
Aerospace components operate under incredible stress. Tiny errors can lead to major failures. Therefore, manufacturing tolerances are exceptionally tight.
This industry requires materials like titanium and Inconel. These are tough to machine but essential for performance. Precision isn’t just nice to have; it’s mandatory.
That’s where reliable CNC 3 axis machining comes into play. It provides the foundational accuracy needed for many critical flight parts.
The Core Challenge: Complexity vs. Cost-Effectiveness
A common dilemma is balancing intricate designs with budget constraints. Complex 5-axis machining is powerful but expensive.
For many brackets, housings, and fittings, full 5-axis capability is overkill. It drives up programming time and machine costs unnecessarily.
The solution? Intelligently applying CNC 3 axis systems. These machines offer superb accuracy for prismatic parts at a lower operational cost.
We team saw in a 2025 project that over 60% of a satellite’s structural components were machined on 3-axis mills. This approach cut costs by 30% without sacrificing quality.
CNC Milling in Practice: A Comparative Analysis
Let’s compare two typical aerospace projects. This shows where 3-axis machining shines.
| Project / Aspect | Project A: Engine Mount Bracket | Project B: Complex Ducting |
|---|---|---|
| Primary Geometry | Prismatic, mostly 2.5D features | Organic, compound curved surfaces |
| Optimal Process | 3-axis CNC milling | 5-axis simultaneous machining |
| Key Advantage | Faster setup, lower programming cost | Single-setup for complex shapes |
| Cost Efficiency | High | Lower for this specific part type |
| Surface Finish | Excellent on top & side walls | Excellent on all contours |
As shown, 3 axis CNC is the champion for prismatic parts. It delivers precision without unnecessary complexity.
A Step-by-Step Guide to Successful 3-Axis Aerospace Machining
Success depends on a meticulous process. Here is a proven five-step guide.
Step 1: Design for Manufacturability (DFM) Review
Analyze the CAD model. Identify undercuts or features needing special tools. Simplify geometries where possible to reduce setups.
Step 2: Strategic Fixturing Design
Design custom fixtures for maximum rigidity. Aerospace materials generate high cutting forces. Poor fixturing causes vibration and inaccuracy.
Step 3: Toolpath Optimization
Use trochoidal and adaptive clearing strategies. These protect the tool and machine. They also maintain consistent material removal rates.
Step 4: In-Process Quality Checks
Implement probe-based datum checks after critical operations. According to a 2023 ASME report, this can reduce scrap rates by up to 45%.
Step 5: Final Verification & Documentation
Perform a full CMM inspection. Document all critical dimensions. This creates a traceable record for aerospace certification.
Common Pitfalls and How to Avoid Them
Another frequent error is ignoring thermal growth. Machines and parts heat up during long operations.
Fun fact: A spindle warming up by just 5°C can introduce a 0.01mm positional shift. That’s huge for aerospace tolerances.
Therefore, implement warm-up cycles and monitor ambient temperature. Controlled environments are key.
Material-Specific Insights: Machining Aerospace Alloys
Aluminum 7075 is common but gummy. Use sharp, polished flutes and high-speed strategies. This prevents material adhesion.
Titanium Ti-6Al-4V is strong but a poor heat conductor. Heat concentrates at the tool tip. Use low RPM, high feed, and constant coolant flow.
Interestingly, sometimes the best solution is a slower, more stable cut. It’s counter-intuitive but saves tools and ensures precision.
Final Checklist for Your Aerospace CNC 3 Axis Project
Before running your first part, verify this list:
- DFM review completed and signed off?
- Fixtures verified for rigidity and access?
- Toolpaths simulated for collisions?
- Coolant concentration and pressure checked?
- Machine warm-up cycle (30+ min) performed?
- First-article inspection plan ready?
- Material certification on file?
Following this structured approach ensures your three axis CNC machining project is reliable from start to finish. Precision is built on process, not just the machine.
Frequently Asked Questions (FAQ)
What are the main advantages of 3 axis CNC vs. 5 axis for basic aerospace brackets?
The main benefits are lower machine cost, simpler programming, faster setup time, and easier operator training. For flat or blocky parts, it’s the most cost-effective precision solution.
How to achieve a fine surface finish on aluminum parts using a 3-axis mill?
Use a small step-over (5-10% of tool diameter), sharp end mills, high spindle speed, and a consistent climb milling direction. Proper chip evacuation is also crucial to avoid re-cutting chips.
What is the typical positioning accuracy needed for aircraft component machining?
For critical aircraft components, positioning accuracy is often required to be within ±0.025mm or tighter. This is well within the capability of a well-maintained 3 axis CNC machine.
Can you machine aerospace-grade titanium effectively on a 3-axis machining center?
Yes, absolutely. It requires rigid tooling, specific carbide grades, and conservative cutting parameters. The key is managing heat and tool pressure through strategic toolpaths.
What are the best workholding solutions for thin-walled aerospace parts on a 3-axis?
Vacuum chucks or custom low-profile modular fixtures are excellent. They provide full support to prevent wall deflection while allowing tool access from the top and sides.