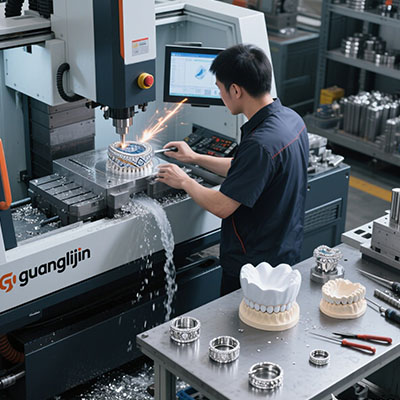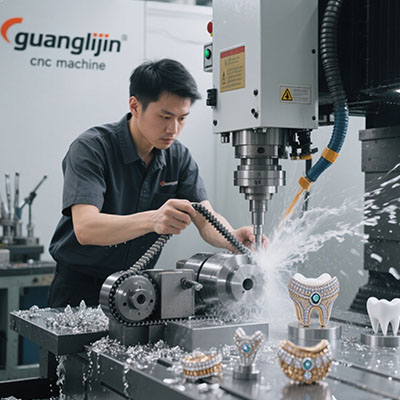
An industrial 2 axis cnc kit solution answers a production question, not a hobby question. Can this machine run eight hours a day, hold tolerance across thousands of parts, and survive a maintenance schedule? That framing changes every component choice.
This guide covers what industrial buyers should demand from a kit, how two common solutions compare, and how to assemble and commission the machine without losing production time.
What Makes a CNC Kit Industrial-Grade?
Industrial grade means duty cycle, not just accuracy. A machine that holds ±0.02 mm for one hour is different from one that holds it for a full shift. Heat, wear, and vibration accumulate.
Three properties define the difference. Structural stiffness resists deflection under continuous load. Thermal stability keeps position consistent as the machine warms. Serviceability allows bearings, belts, and screws to be replaced without scrapping the frame.
Duty Cycle, Thermal Stability, and Serviceability
Duty cycle drives motor and driver selection. Continuous operation needs drivers rated for sustained current, not peak. Thermal stability needs temperature monitoring and compensation. Serviceability needs accessible fasteners and documented maintenance intervals.
A kit that ignores any of these becomes a bottleneck. Downtime costs more than the kit premium.
Comparison: Belt-Driven Kit vs Ball Screw Kit
Two industrial 2 axis cnc kit architectures dominate the market. Each suits different production profiles. The table below compares them on the factors that matter on a shop floor.
| Factor | Project A: Belt-Driven Kit | Project B: Ball Screw Kit |
|---|---|---|
| Maximum speed | High; suited to contouring and routing | Moderate; suited to precise positioning |
| Positioning accuracy | ±0.05 mm typical | ±0.02 mm with compensation |
| Backlash risk | Higher; belt stretch over time | Lower; preloaded double nut |
| Maintenance | Belt tension checks, idler inspection | Screw lubrication, preload verification |
| Duty cycle suitability | Light to moderate continuous load | Heavy continuous load |
| Typical kit cost | $600–$1,200 USD | $1,500–$3,500 USD |
Project A suits high-speed routing and foam work. Project B suits milling and drilling where position matters more than speed. The choice follows the part mix, not the price list.
Step-by-Step Industrial Kit Assembly
Industrial installation happens under time pressure. Follow this sequence to avoid rework.
Step 1: Survey the Installation Site
Check floor flatness and vibration isolation. Measure ambient temperature range across a shift. Confirm power quality and grounding. A machine installed on a moving floor cannot hold tolerance, no matter how good the kit.
Step 2: Assemble the Frame and Verify Squareness
Build the frame on a flat reference. Tighten corner joints in stages, checking diagonals after each pass. Target diagonal mismatch under 0.5 mm. Squareness at the base prevents alignment problems throughout the build.
Step 3: Mount Rails and Verify Parallelism
Bolt rails to machined backing plates. Torque to specification in a cross pattern. Measure parallelism along full travel with a dial indicator. Record the result. Industrial maintenance schedules depend on these baseline numbers.
Step 4: Install the Drive and Set Preload
For belt drive, tension to the manufacturer’s specification and check deflection at mid-span. For ball screw drive, set double-nut preload and measure backlash. Target under 0.02 mm for industrial positioning work. Record both values.
Step 5: Wire Power and Signal Separately
Route motor and spindle cables in separate trays from signal and limit switch wiring. Use shielded cable for limits and ground the shield at one end. Industrial environments add electrical noise; clean wiring prevents intermittent faults.
Step 6: Calibrate and Load Compensation
Command a 100 mm move and measure actual travel. Scale steps-per-mm accordingly. Load backlash and pitch compensation into the controller. Save the configuration with a date stamp and file it with the machine records.
Step 7: Run a Production Qualification Cycle
Machine a representative part, then repeat it twenty times. Measure every part. Check for drift across the run. A single good part proves little. A stable run proves the kit is ready for production.
⚠ Attention: Industrial Installation Mistakes
⚠ Ignoring ambient temperature swings. A shop that varies by 10 °C across a shift will see position drift. A 1 m steel screw grows about 0.012 mm per °C rise (source: Machinery’s Handbook, thermal expansion of steel, 31st edition). Monitor temperature and compensate.
⚠ Using peak current ratings for continuous duty. Drivers set to peak current overheat during long shifts. Set current to the motor’s continuous rating and verify case temperature after one hour.
⚠ Skipping baseline records. Without recorded parallelism, backlash, and calibration values, maintenance becomes guesswork. Record everything at commissioning.
A 2025 Team Case on Duty Cycle
Our team commissioned an industrial belt-driven kit in 2025 for a foam packaging line. The machine ran two shifts a day. After three weeks, X-axis position drifted by 0.08 mm.
The cause was belt tension loss, not electronics. The idler bearings had worn and the belt had stretched. We replaced the idlers with sealed bearings and added a monthly tension check. Drift stayed under 0.03 mm afterward. The kit was capable; the maintenance plan was missing.
Frequently Asked Questions
What is an industrial 2 axis CNC kit used for?
Industrial two-axis kits handle flat part production: routing, drilling, foam cutting, and panel fabrication. They suit continuous operation where position and repeatability must hold across a shift.
How much does an industrial 2 axis CNC kit cost?
Belt-driven kits run $600–$1,200 USD. Ball screw kits with preloaded drives run $1,500–$3,500 USD. Add installation, calibration, and a maintenance plan to the total cost of ownership.
How do I choose between belt drive and ball screw for a 2 axis CNC kit?
Choose belt drive for speed and lighter loads. Choose ball screw for positioning accuracy and heavier continuous load. Match the drive to the part mix and duty cycle, not to the lowest price.
What maintenance does an industrial 2 axis CNC kit need?
Check belt tension monthly or ball screw lubrication per schedule. Verify backlash quarterly. Clean rails every 50 operating hours. Review calibration records every 500 hours and recalibrate after any crash or hardware change.
Can an industrial 2 axis CNC kit run continuously?
Yes, if motors and drivers are rated for continuous duty and thermal compensation is configured. Verify case temperatures after the first hour and monitor drift across a full shift before committing to production.
Checklist: Industrial Kit Commissioning
□ Installation site surveyed for floor flatness and vibration
□ Ambient temperature range measured across a shift
□ Power quality and grounding verified
□ Frame squareness checked with diagonal measurement
□ Rail parallelism measured and recorded
□ Belt tension or ball screw preload set to specification
□ Backlash measured and recorded
□ Power and signal cables routed in separate trays
□ Limit switch cables shielded and grounded at one end
□ Steps-per-mm calibrated from measured travel
□ Compensation loaded and configuration saved
□ Twenty-part qualification run measured for drift
□ Maintenance schedule and baseline records filed
An industrial 2 axis cnc kit solution succeeds when the machine holds tolerance across a shift, not just on the first part. Stiff structure, rated electronics, and a maintenance plan carry production reliability. For teams benchmarking industrial tolerances against broader machining capabilities, this CNC machining reference offers a practical baseline for accuracy and inspection practice.