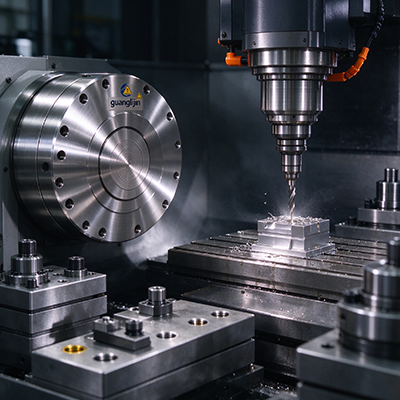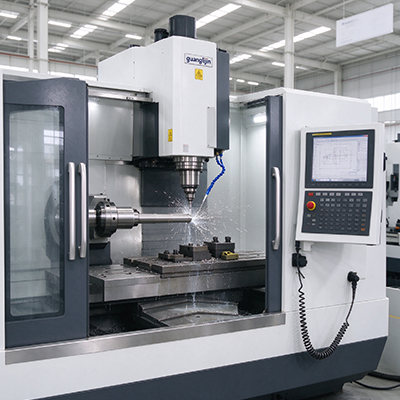
SEO Description: Precision cnc 3 axis milling machine component machining. Real data on datums, runout, and probe steps.
A machined component is only as precise as the references that produced it. Two shops cut the same housing. One holds bore position within 0.015 mm. The other scrapes through at 0.040 mm and blames the machine. The difference lives in datum discipline, tool runout, and how honestly the setup measures itself.
Component machining on a cnc 3 axis milling machine rewards process control over raw spindle power. This guide covers the setup decisions that separate repeatable precision from lucky first articles.
The Datum Problem Most Shops Ignore
Prints specify datums for a reason. Three-axis machining often uses a raw stock edge as reference. That edge varies between castings or forgings. The error enters before the first cut and compounds through every operation.
The solution is sequencing. Face the stock first. Establish a machined datum surface. Probe that surface and set work offsets from it. The raw stock edge becomes irrelevant. Every feature references a surface the machine just created.
This adds fifteen minutes per part. It removes a variable that no amount of spindle accuracy can overcome. Precision component machining starts with a reference you control.
Comparison: Two Component Machining Approaches
| Setup Element | Project A: High-Mix Component Shop | Project B: Dedicated Component Cell |
|---|---|---|
| Datum Strategy | Machine a reference face, probe it per batch | Dedicated fixtures with hardened datum pads |
| Fixture Type | Modular vises, quick-change pallets | Hydraulic dedicated fixtures |
| Tool Setting | Laser presetter, offsets loaded per job | Presetter plus in-machine verification probe |
| In-Process Checking | Probe critical bores after roughing | Probe every part, trend results |
| Typical Tolerance | ±0.025 mm | ±0.010 mm |
| Setup Time | 45–90 minutes per part number | 15–30 minutes with pallet automation |
| Best For | Varied work, 10–200 piece batches | Stable part family, 500+ batches |
Project A trades setup time for flexibility. Project B invests in fixtures and probing to buy repeatability at volume. Neither is universal. The right column depends on your order book and your tolerance exposure.
DN Solutions builds the DNM 6700 with 1,300 kg table capacity and 15,000 rpm spindle . Haas offers the VF-2 with 1,219 mm X travel and 8,100 rpm standard . These platforms cover the mid-range component work that fills most job shops.
Step-by-Step: Precision Component Machining Workflow
- Face and Establish the Primary Datum. Cut the reference surface first. Probe it and set the work offset from the machined face, not the stock edge. This single step eliminates stock variation from every downstream feature.
- Measure Tool Runout Before Every Job. A holder running 0.015 mm out at the tip cuts holes larger than programmed. Use a dial indicator on the tool shank. Shrink-fit holders should measure below 0.005 mm . Replace worn holders; do not compensate with cutter radius offsets.
- Set Tool Length With a Presetter, Not the Part. Touching off on the workpiece introduces variation from surface finish and contact pressure. A laser or contact presetter measures length to a few microns. Load offsets into the control. Verify the first tool with a probe before cutting.
- Probe After Roughing for Offset Correction. Roughing generates heat and relieves residual stress. The part moves. Probe critical features after roughing and update wear offsets before finishing. One component shop cut scrap by 33% in 2025 with this single step .
- Control Thermal Drift During the Shift. Run a 20–30 minute warm-up. Check spindle and ballscrew temperatures against the control’s thermal model. Machines with active compensation adjust positions in real time. Machines without it require manual offset checks every two hours.
- Verify the First Part Completely, Then Trend. Measure every critical feature on the first article. Log the results. Probe subsequent parts at critical features and plot the data. A drift curve signals wear, thermal growth, or fixture movement before scrap appears.
Mistakes That Cost Precision in Component Work
⚠ Attention: Avoid clamping thin-wall components with uncontrolled vise pressure. A 0.8 mm wall deflects under clamping force before the cutter touches it. Use low-pressure hydraulic clamping or vacuum fixturing. Probe the clamped part to capture the actual position, not the free-state position.
We worked with a component shop in 2025 that fought a persistent bore taper problem on aluminum housings. The machine passed ballbar and laser tests. The culprit was vise clamping sequence. Clamping one jaw first tilted the part 12 microns before the second jaw engaged. Changing to simultaneous hydraulic clamping removed the taper. The machine was never the problem. The workholding was.
Another error involves coolant concentration. A lean mix accelerates tool wear on steel components. A rich mix foams and fails to evacuate chips. Check refractometer readings weekly. Precision components depend on consistent cutting conditions, not just consistent machine position.
Tooling and Fixture Decisions That Hold Tolerance
Fixture rigidity matters as much as machine rigidity. A modular vise on a T-slot table works for moderate work. Hydraulic fixtures with hardened datum pads hold better on production runs. The fixture must resist lateral cutting force, not just gravity.
Tool geometry follows material behavior. Aluminum rewards high helix angles and polished flutes. Steel demands coatings and edge preparation. Titanium needs variable-pitch geometry to break harmonics. Match the tool to the material, not to the catalog’s general-purpose recommendation.
Thermal stability extends to the fixture. A steel fixture and an aluminum part grow at different rates. Long cycles shift the clamping relationship. Probe the part after roughing and adjust offsets to the measured condition. The best cnc 3 axis milling machine solutions make probing data accessible through the control. Shops that use it catch drift early.
Frequently Asked Questions
Q: What tolerance can a precision 3-axis CNC milling machine hold on component work?
A: ±0.010 mm to ±0.025 mm is realistic with glass scales, thermal compensation, probe verification, and disciplined tool setting. Tighter tolerances demand temperature-controlled rooms and in-process measurement. The machine is one factor; the setup determines the result.
Q: Why does tool runout matter so much in precision component machining?
A: Runout directly enlarges holes and shifts surface finish. A tool running 0.015 mm out cuts a bore 0.015 mm oversize before any machine error enters. Keep runout below 0.005 mm with shrink-fit or hydraulic holders. Replace worn holders rather than compensating in offsets .
Q: How do I reduce scrap on precision 3-axis component machining jobs?
A: Machine a reference datum first. Probe after roughing and update offsets. Verify the first part completely. Trend probe data across the batch. Most scrap comes from datum drift, clamping distortion, and tool wear, not machine positioning error.
Q: When should I use a probe on a 3-axis CNC mill for component machining?
A: Probe the machined datum, verify tool length on the first tool, and check critical features after roughing. Table-mounted probes verify fixture position at shift start. Data logging turns each probe result into a trend that catches drift before scrap.
Precision component machining is a sequence of controlled references. Machine the datum. Probe it. Set tools with a presetter. Probe after roughing. Trend the results. The machine provides the capability. The process delivers the part.
✅ Precision Component Machining Checklist
- Primary datum machined and probed before other features
- Tool runout measured below 0.005 mm for all critical tools
- Tool lengths set with laser or contact presetter
- First tool verified with probe before cutting
- Clamping pressure regulated for thin-wall components
- Probe cycle scheduled after roughing for offset correction
- Warm-up cycle completed before precision features
- Thermal compensation active or offset checks scheduled
- First article measured completely and results logged
- Probe data trended across the batch
- Coolant concentration checked with refractometer
- Fixture rigidity verified against lateral cutting force
Data sources: DN Solutions DNM series specifications ; Haas Automation VF-2 specifications ; component machining process guidance (2025) .