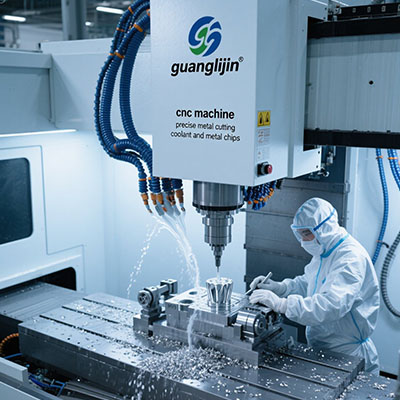
Aerospace fabrication rarely accepts off-the-shelf answers. A standard engraver may lack the travel for a long wing rib. It may flex under a fast spindle on a titanium plate. Custom configuration closes that gap. A tailored 3 axis cnc engraving machine matches travel, rigidity, and control to the parts you actually build. This article covers how to specify one, how to test it, and where custom builds fail.
When Standard Equipment Falls Short in Aerospace Fabrication
Off-the-shelf machines fit common jobs. Aerospace work is not common. Parts run long, thin, or curved. Fixtures get heavy. Tolerances tighten.
Travel is the first limit. A standard 600mm table cannot hold a 1.2m spar section. The part must be repositioned, which adds setups and error. Custom travel removes that problem at the design stage.
Rigidity is the second limit. Aerospace alloys include titanium and hardened stainless. These materials push back on the tool. A light frame chatters. The engraving line turns ragged. Custom builds specify frame mass and damping for the actual material mix.
Control features are the third limit. Traceability engraving needs smooth small-arc motion and reliable depth control. Standard controls may lack the lookahead blocks for fine curves. Custom specification fixes this before delivery.
Therefore, the custom route makes sense when part size, material, or traceability demands exceed catalog capability. It costs more upfront. It saves rework and scrap over the program life.
Specifying a Custom 3 Axis Engraving Machine
Specification starts with the part, not the machine. Build the requirement list from real drawings.
Travel and Work Envelope
Measure the largest part in the catalog. Add fixture space and tool clearance. Add 15% headroom for future work. Undersizing travel forces repositioning, which adds cost on every run.
Frame and Structural Damping
Match frame mass to the hardest material. Titanium engraving needs more damping than aluminum. Cast iron or polymer concrete bases reduce vibration. Ask for a vibration test at the spindle nose under cutting load.
Spindle Choice
Small engraving tools need high RPM with low runout. Specify runout under 0.01mm at operating temperature. Specify continuous duty rating, not peak. Aerospace runs are long. A spindle that overheats mid-run loses depth control.
Control and Traceability Features
Specify lookahead block count for smooth arcs. Specify depth control resolution. Add probe capability for setting Z on curved surfaces. Traceability engraving must be readable and repeatable. These features belong in the specification, not in a post-delivery upgrade.
Project Comparison: Two Custom Aerospace Engraving Builds
| Factor | Project A: Long Panel Marking Cell | Project B: Curved Bracket Detail Cell |
|---|---|---|
| Part size | 1200mm × 300mm plate | 180mm × 90mm curved bracket |
| Material | 6061-T6 aluminum | Titanium 6Al-4V |
| Travel specified | 1400mm × 400mm × 150mm | 400mm × 300mm × 200mm |
| Frame requirement | Long bed, moderate damping | Compact, high damping |
| Spindle | 18,000 RPM, 0.008mm runout | 24,000 RPM, 0.005mm runout |
| Control feature | High block lookahead for long paths | Probe-based Z setting for curves |
| Main risk | Bed sag over length | Chatter on curved surface |
| Relative build cost | Higher travel cost | Higher damping and spindle cost |
Project A spends on travel and bed stiffness. Project B spends on damping and spindle quality. Neither build suits the other’s job. That is the point of custom specification. Match the machine to the part family, not to a price target.
Step-by-Step Custom Build Process
Step 1 — Collect the part family drawings. List the largest part, the hardest material, and the tightest depth tolerance. These three items drive travel, frame, and spindle choices.
Step 2 — Define the fixture plan before the machine. Heavy fixtures need a stronger bed. Curved parts need probe access. Fixture design informs the work envelope and the control specification.
Step 3 — Write the acceptance test into the contract. Specify a test part, a measurement method, and a pass threshold. Depth within ±0.02mm and edge quality under magnification are reasonable starting points. Payment should tie to the test result.
Step 4 — Witness the build and the run-off. Visit during assembly. Watch the spindle warm-up and the first cuts. Measure the test part yourself. A witnessed run-off exposes issues that a report hides.
Step 5 — Run a pilot production batch on site. Machine 30–50 real parts after installation. Track depth drift, tool wear, and cycle time. Document the baseline. This data supports future maintenance and repeat orders.
⚠ Attention: Do not accept a custom machine without a written acceptance test. Verbal assurances fail when depth drifts on titanium. Define the test part, the measurement tool, and the pass threshold before the build starts. Tie final payment to the measured result. This single step prevents most custom-build disputes.
Common Mistakes in Custom Aerospace Engraving Builds
Specifying travel without bed stiffness. A long bed that sags cuts shallow in the center. Specify bed deflection under load, not just travel distance.
Choosing spindle speed over spindle stability. A high RPM rating means little if runout grows under load. Ask for runout data at cutting temperature and under continuous duty.
Leaving the control out of the specification. Lookahead and depth resolution decide curve quality. Treat them as core requirements, not optional upgrades.
Ignoring the fixture in the work envelope. A machine that fits the part may not fit the fixture. Add fixture space to every travel calculation.
Skipping operator training on the custom build. Custom controls and probe routines need training. Untrained operators lose the precision the build paid for.
Frequently Asked Questions About 3 Axis CNC Engraving Machines
Q: What travel size should I specify for custom aerospace engraving?
A: Measure the largest part plus fixture space. Add 15% headroom for future work. Undersizing travel forces repositioning on every run and adds error.
Q: Can a 3 axis cnc engraving machine handle titanium aerospace brackets?
A: Yes, with a damped frame and a stable high-speed spindle. Titanium work-hardens, so sharp tools and steady feed matter. Expect shorter tool life than aluminum and tighter process control.
Q: How do I test a custom engraving machine before final payment?
A: Write an acceptance test into the contract. Specify a test part, a measurement tool, and a depth tolerance. Witness the run-off and measure the part yourself. Tie payment to the result.
Q: What depth tolerance is realistic for aerospace engraving on curved surfaces?
A: A stable machine with probe-based Z setting holds ±0.02mm to ±0.03mm on shallow curves. Steeper curves widen the band. Test at multiple points on the surface to confirm capability.
Q: Does a custom 3 axis cnc engraving machine need special maintenance?
A: It follows the same schedule as standard equipment. Daily cleaning, weekly lubrication checks, monthly runout checks, and yearly spindle service. Custom builds should ship with a written maintenance log.
Operational Checklist for Custom Aerospace Engraving Builds
☐ Largest part and hardest material identified from real drawings
☐ Travel specified with fixture space and 15% headroom
☐ Bed deflection under load specified and tested
☐ Frame damping matched to the material mix
☐ Spindle runout specified under 0.01mm at operating temperature
☐ Continuous duty spindle rating confirmed
☐ Control lookahead and depth resolution specified
☐ Probe capability included for curved surface Z setting
☐ Acceptance test written into the contract with pass thresholds
☐ Run-off witnessed and test part measured independently
☐ Pilot production batch run and documented on site
☐ Operator training completed before handover
_A custom 3 axis cnc engraving machine succeeds when the specification follows the part. Travel, damping, spindle stability, and control features all trace back to real drawings. Our team ran a custom build review in 2025 where a bed deflection test caught a sag issue before delivery. That single test saved a full rework cycle.