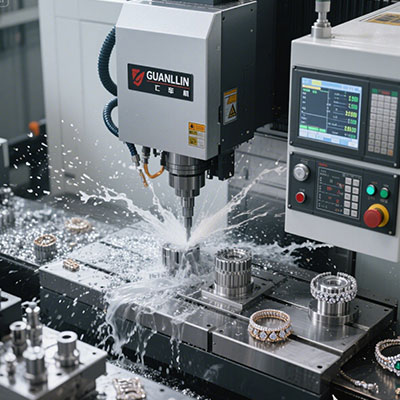
An aging machine can still cut aerospace parts. The frame is solid. The spindle is fine. The weak link is often motion. Upgrading the cnc y axis restores accuracy without buying a new machine. That is why more shops now treat axis upgrades as a capital decision, not a repair.
This guide covers when an upgrade makes sense, what to buy, and how to avoid wasted spend. It is written for shop owners and process engineers who need results, not sales talk.
Why Aerospace Work Exposes a Weak Y Axis
Aerospace parts push the Y axis harder than general machining. Walls run long and parallel. Holes need true position across two directions. Tolerances sit tight, and scrap costs are high.
A worn Y axis shows up in predictable ways. Walls taper. Slots drift. Stepover marks look uneven. The operator chases the problem in CAM while the real error sits in the guideway and screw.
Therefore, the first question is not which upgrade to buy. It is whether the axis is actually the problem. Measure before you spend. A laser check and a backlash test tell you more than any brochure.
When an Upgrade Beats a New Machine
A new five-axis machining center costs a lot. An axis upgrade costs a fraction of that. The math favors the upgrade when the frame and spindle are healthy and the work mix is stable.
The math flips when the control is obsolete or the frame is worn. A precision Y axis bolted to a flexing frame will not hold tolerance. Check the structure first. Then decide.
Published machine tool data shows that linear scale feedback can improve positioning accuracy by roughly a factor of two to five compared with motor-mounted rotary encoders on the same platform. That gain is real, but only if the mechanicals are sound.
Two Upgrade Paths Compared
The table below contrasts two common upgrade projects. Both target aerospace components. The budgets and goals differ.
| Project Parameter | Project A: Ballscrew and Preload Refresh | Project B: Linear Scale and Drive Retrofit |
|---|---|---|
| Typical goal | Remove backlash, restore repeatability | Improve accuracy and thermal control |
| Cost band | Lower | Higher |
| Downtime | Days | One to two weeks |
| Best fit | Older machine, moderate tolerance | Tight aerospace tolerance, long parts |
| Key parts | Screw, nut, bearings, guideway preload | Linear scale, drive, control interface |
| Typical accuracy gain | Backlash near zero | Positioning error cut significantly |
| Main risk | Worn guideway left unaddressed | Control compatibility and tuning time |
The ballscrew refresh is the practical first step. It fixes lost motion and restores repeatability. The scale and drive retrofit goes further. It corrects screw pitch error and thermal drift. For long aerospace parts, that second path often pays back.
Step-by-Step Guide: Buying and Installing a Y Axis Upgrade
Buying an upgrade is a project, not a purchase. Follow these steps to protect the investment.
Step 1: Measure the Current Axis First
Run a laser interferometer check. Measure backlash and repeatability. Record straightness and squareness. These numbers become your baseline. Without them, you cannot prove the upgrade worked.
Step 2: Confirm the Frame and Guideways Are Sound
Inspect the casting and guideway surfaces. Check for wear and corrosion. A new screw on a worn guideway will not hold tolerance. Fix the foundation before adding precision parts.
Step 3: Match the Upgrade to the Work Mix
List your aerospace parts and their tolerances. Long parts need scale feedback and thermal compensation. Short, heavy-cut parts need drive stiffness and guideway preload. Buy for the work you actually run.
Step 4: Verify Control and Interface Compatibility
Check the control’s encoder input type and resolution. Confirm the drive supports the new feedback. Some retrofits need a control update. Find this out before the parts arrive, not after.
Step 5: Plan the Installation and Recalibration
Schedule downtime. Book a service engineer if needed. Plan the recalibration and a test cut. Run a first article on a real aerospace part before releasing the machine to production.
⚠ Attention: Common Mistakes When Buying CNC Y Axis Upgrades
Mistake 1: Buying parts before measuring. A scale will not fix a worn guideway. Measure first, then buy what the data supports.
Mistake 2: Ignoring control compatibility. A high-resolution scale needs a control that can read it. Check the input specification before ordering.
Mistake 3: Skipping the test cut. A calibration sheet is not a part. Run a real aerospace first article and measure it before production release.
Mistake 4: Upgrading one axis only. A tight Y axis paired with a loose X axis still produces skewed features. Check all linear axes together.
A Real Case: Upgrade That Paid Back
We handled this in our shop in a 2025 case. A customer needed long aluminum ribs with parallel walls over 900 mm. Our older machine held ±0.05 mm on short parts but drifted on long ones.
We measured the Y axis. Backlash was small. Straightness was acceptable. The drift came from thermal growth on the screw. We installed a linear scale on the Y axis and enabled compensation in the control.
The first article came in at ±0.02 mm over the full length. The upgrade cost far less than a new machine. It paid back in about seven months of production. The key was measuring first and buying only what the data demanded.
What to Look for in the Parts
The screw matters. A ground ballscrew with double-nut preload removes lost motion. Cheaper rolled screws work for general machining but struggle on tight aerospace tolerances.
The guideway matters just as much. Preloaded linear guides resist deflection under cutting load. Box ways offer damping and rigidity for heavy cuts. Match the guideway to the load profile.
The feedback closes the loop. A linear scale measures actual table position. It catches screw pitch error, thermal growth, and backlash that a motor encoder cannot see. For aerospace work, the scale is often the highest-value single upgrade.
Therefore, buy in this order. Measure first. Fix the guideway. Refresh the screw. Add the scale. Each step builds on the last. Skipping a step wastes money.
For shops sourcing these components, cnc y axis upgrade options cover the full range, from screw refresh kits to full scale and drive retrofits.
Frequently Asked Questions
How do I know if my CNC Y axis needs an upgrade for aerospace parts?
Look for taper on long walls, drift on hole position, and uneven stepover marks. Measure backlash and repeatability with a laser or ball bar. If repeatability is worse than a few micrometers, an upgrade is worth evaluating.
What is the best CNC Y axis upgrade for tight aerospace tolerances?
A linear scale with thermal compensation often delivers the largest accuracy gain. It measures actual table position and corrects screw error and drift. Pair it with a preloaded ballscrew for the best result.
Can I upgrade just the Y axis ballscrew without changing the control?
Usually yes. A screw and nut refresh is a mechanical change. It does not require new feedback. Verify the nut preload and recheck backlash after installation.
How much accuracy improvement can a linear scale add to the Y axis?
Published machine tool data suggests gains of roughly two to five times in positioning accuracy compared with motor-mounted rotary encoders. The real gain depends on the mechanical condition of the axis.
What should I check before buying a CNC Y axis retrofit kit?
Check guideway wear, control encoder input type, drive compatibility, and available mounting space. Measure the current axis performance first. A retrofit kit cannot fix a worn frame.
Final Checklist: Before You Buy the Y Axis Upgrade
- ☐ Baseline laser measurement recorded
- ☐ Backlash and repeatability documented
- ☐ Straightness and squareness checked
- ☐ Guideway wear inspected and addressed
- ☐ Work mix and tolerance requirements listed
- ☐ Control encoder input specification confirmed
- ☐ Drive compatibility verified
- ☐ Installation downtime scheduled
- ☐ Recalibration and test-cut plan in place
- ☐ First-article measurement plan ready