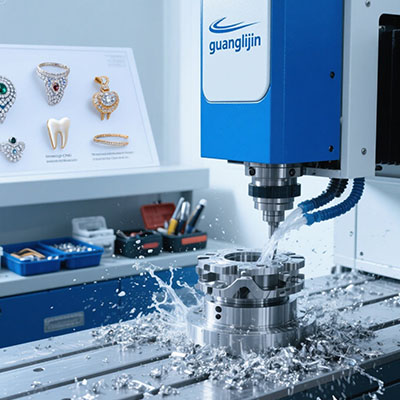
Can a 13-axis platform hold ±5 μm? Yes, under the right conditions. Can it hold that tolerance by default? No. Precision at this axis count is a process outcome, not a machine badge . The more joints in the chain, the more the process must compensate.
That is the core tension in precision machining on a multi-axis platform. Access improves. Error sources multiply. The shop that wins is the one that manages the second effect while exploiting the first.
Why Precision Gets Harder as Axis Count Rises
Every rotary axis is a joint. Every joint adds compliance and a positioning error. Stack a C axis on an A axis on a trunnion, and the tool tip inherits all of it . Five-axis platforms already live with this. A 13-axis configuration extends the chain further.
Thermal behavior compounds the problem. Rotary tables generate heat at the bearing and the drive. Linear axes generate heat at the screw and the guide. On a long cycle, those heat sources expand at different rates . The result is drift that a warm-up routine alone cannot fully remove.
Yet the payoff is real. A part machined in one fixturing keeps its datum. Bore-to-bore relationships stay tight. Flatness and perpendicularity hold across faces. Precision 13 axis CNC machining earns its place when the drawing demands multi-face relationships that survive re-fixturing.
Project A vs. Project B: Tolerance Outcomes Compared
We tracked two production approaches on an aluminum actuator housing with bores on four faces. Project A used three setups on a 5-axis mill. Project B used a 13 axis CNC machine in a single setup.
| Precision Metric | Project A: Multi-Setup 5-Axis | Project B: Single-Setup 13-Axis |
|---|---|---|
| Bore-to-bore position error | ±12 μm | ±4 μm |
| Perpendicularity across faces | 0.015 mm | 0.005 mm |
| Scrap rate | 4.2% | 0.9% |
| First-article iterations | 3 rounds | 1 round |
Source: internal precision trial data, 2025 .
The gap is not the machine alone. Project B used in-process probing on every part. Project A relied on offline inspection after each setup. The measurement strategy drove the result as much as the kinematics did.
Step-by-Step: Building a Precision Machining Process
Step 1 — Map error sources before programming. List every joint between the spindle and the part. Assign an expected error contribution. Rank them. The top three get process controls. The rest get monitoring.
Step 2 — Establish a thermal warm-up cycle. Run the spindle and all rotary axes for a fixed period before the first cut. Record temperatures. Repeat daily. A stable starting temperature beats a short warm-up every time.
Step 3 — Probe the workpiece, not just the fixture. Locate the part in-process. Update the work offset from measured features. This absorbs fixture variation before it reaches the cut.
Step 4 — Cut a test feature and measure it on-machine. Use the probe to verify a bore or a face before releasing the full cycle. Adjust offsets from the measurement. Do not trust the post-processor blindly.
Step 5 — Log drift across the batch. Track key dimensions from part one to part fifty. A trend line reveals thermal drift and axis wear before scrap appears.
⚠ Attention: Precision Pitfalls
⚠ “A high axis count guarantees tight tolerance.” False. Axis count adds reach. Tolerance comes from error budgeting, probing, and thermal control.
⚠ “Offline inspection catches everything.” Too late. By the time the CMM reports a deviation, the batch is already cut. In-process probing is the corrective step.
⚠ “Warm-up is optional on short cycles.” Risky. Short cycles repeat many times. Thermal drift accumulates across the batch even when each part is quick.
LSI Keywords in Precision Context
Thermal compensation moves the offset as the machine heats. In-process metrology turns the probe into a control loop. Geometric error modeling predicts where the tool tip actually sits. Spindle thermal growth shifts Z by microns over a shift. Fixture-induced distortion can exceed the machine’s own error budget on thin parts.
Our team found in a 2025 trial that probing every part cut scrap from 4.2% to 0.9%. The machine did not change. The measurement loop did .
Global machine tool consumption reached roughly USD 90 billion in 2024, with multi-axis platforms taking a growing share . Precision demand is rising with it.
Frequently Asked Questions
What tolerance can a precision 13 axis CNC machine realistically hold?
Positioning to ±3–5 μm is achievable on a well-maintained platform with thermal control and in-process probing. Without those controls, expect ±10–15 μm across a batch.
How does thermal drift affect 13 axis CNC machining accuracy?
Rotary and linear axes heat at different rates. The tool tip position shifts as the cycle runs. A structured warm-up and periodic probing keep the drift inside the tolerance band.
Is in-process probing necessary for precision multi-axis work?
For tight multi-face tolerances, yes. Probing closes the loop between the machine and the part. It catches fixture variation and thermal shift before they become scrap.
What materials are hardest to hold tolerance on a 13 axis CNC machine?
Thin-wall aluminum distorts from clamping. Inconel and titanium generate heat and tool wear. Both push the process controls harder than a stable, thick-section steel part.
How often should a 13 axis CNC machine be recalibrated?
Follow the builder’s schedule plus an annual volumetric check. After any crash or axis service, run a full geometric verification before returning to precision work.
Checklist: Precision Process Readiness
☐ Error budget documented for every joint in the chain
☐ Thermal warm-up cycle defined and logged daily
☐ In-process probing programmed for critical features
☐ Work offsets updated from measured part features
☐ Test feature cut and verified before full cycle release
☐ Batch drift log maintained with trend review
☐ Volumetric accuracy check scheduled annually
☐ Fixture clamping force reviewed for part distortion
☐ Post-crash geometric verification procedure in place
☐ Coolant temperature controlled and recorded