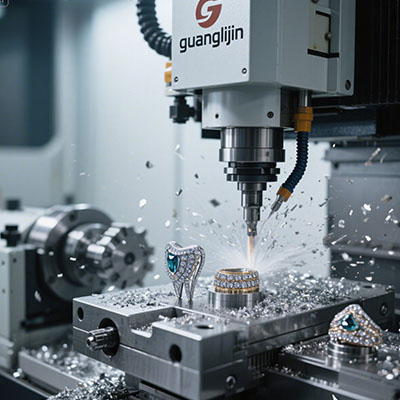
Aerospace fabrication leaves little room for error. A single out-of-tolerance feature can ground a program. This is why expert shops lean on cnc milling 5 axis for critical parts. The extra axes unlock access, tighten feature relationships, and cut setup count.
CC fabrication means custom and complex work. It means parts designed for function, not for easy machining. This guide covers what that demands, how five-axis work answers it, and where fabrication teams go wrong.
What “Expert CC Fabrication” Really Demands
CC fabrication covers custom and complex components. The geometry is rarely simple. Ports sit at compound angles. Flanges curve. Walls taper. Internal cavities twist in ways that a three-axis spindle cannot reach.
Expert shops must plan from the model, not from a proven program. Every job brings a new fixture and a new set of risks. The planning discipline matters more than the spindle horsepower.
Therefore, the real demand is not just machine capability. It is process discipline. Simulation, datum planning, and first-article verification carry the job. The machine provides reach; the process provides precision.
How Five-Axis Work Answers the Access Problem
Three-axis milling handles flat faces and straight walls well. Angled features force extra setups. Each setup introduces a datum shift. On parts with tight position tolerances between features, those shifts compound.
Five-axis machining tilts the spindle and rotates the table. The tool reaches angled faces without unclamping. The datum stays intact. Feature relationships stay tight. Setup count drops.
We saw this in a 2025 case in our shop. A customer sent a custom titanium valve housing with four angled ports and a thin mounting flange. The three-axis plan required five setups and a custom angle plate. We rebuilt the plan around positional five-axis work. Two setups. The flange stayed flat. The ports hit position on the first article.
That outcome came from planning, not luck. We simulated the full path with the real holder model. We checked rotary calibration before the cut. Preparation did the heavy lifting.
Two Aerospace Fabrication Projects Compared
The table below contrasts two CC fabrication jobs. Both are low-volume and high-mix. The priorities differ.
| Project Parameter | Project A: Custom Titanium Valve Housing | Project B: Custom Inconel Combustor Liner |
|---|---|---|
| Part count | 8 pieces | 3 pieces |
| Primary challenge | Compound-angle ports, thin flange | Heat, tool wear, curved cooling holes |
| Setup count (3-axis plan) | 5 setups | 7 setups |
| 5-axis strategy | 3+2 positional for ports | Simultaneous motion for curved features |
| Typical tolerance | ±0.02 mm on port position | ±0.015 mm on liner profile |
| Main risk | Flange distortion from clamping | Tool wear and surface hardening |
| Tooling focus | Sharp carbide end mills, high helix | Coated ball nose, through-coolant |
| Inspection method | CMM with port-axis alignment | Profile scan plus CMM checkpoints |
The valve housing is an access problem. Positional five-axis work removes three setups and protects the flange. The combustor liner is a thermal problem. Simultaneous motion keeps the cutter engaged at a stable angle, but tooling and coolant strategy carry the result.
Step-by-Step Guide: Planning an Expert Five-Axis Aerospace Job
Good planning beats a bigger machine. Follow these steps before the first chip flies.
Step 1: Map Each Feature to an Axis Strategy
List every feature on the drawing. Mark whether it needs three-axis, positional five-axis, or simultaneous five-axis access. This map drives the setup plan. It also exposes features that can be combined into one operation.
Step 2: Choose Datums That Survive the Whole Job
Custom aerospace parts often lack a natural datum. Pick a primary face and two locating features that stay accessible. If the datum is buried after roughing, you lose your reference for finishing. Plan the sequence so critical datums are cut early or protected.
Step 3: Design the Fixture Around the Part
Thin flanges and curved walls distort under clamping force. Use custom soft jaws or a conformal fixture. Support the part under the cut zone. Keep clamp pressure light. A rigid fixture with low force beats a heavy clamp every time.
Step 4: Simulate with the Real Tool Holder and Fixture
Five-axis motion paths are not intuitive. Load the actual holder model. Check clearance on every tilted approach. Check table-to-spindle distance on deep pockets. A crash in simulation costs minutes. A crash on the machine costs days.
Step 5: Cut a First Article and Measure Before Proceeding
Custom parts have no history. Cut one piece. Measure all critical features. Compare results to the model. Adjust the program if needed. Lock the program only after the first article passes.
⚠ Attention: Common Mistakes in Expert Five-Axis Aerospace Fabrication
Mistake 1: Treating a custom part like a production part. Production programs are proven. Custom programs are untested. Budget extra time for simulation and first-article checks.
Mistake 2: Ignoring rotary axis error on long parts. A small rotary error grows with distance from the center of rotation. On long aerospace parts, verify rotary calibration before the job.
Mistake 3: Over-clamping thin custom features. Five-axis access does not fix a distorted part. Light clamping force and conformal support are essential on thin flanges and walls.
Mistake 4: Skipping the actual stock model check. Castings and forgings vary. Check the real stock envelope before programming. A program built on nominal stock may cut air or crash.
Material Behavior and Process Control
Aerospace fabrication spans aluminum, titanium, and nickel alloys. Each behaves differently under the cutter. Aluminum cuts fast and hot. Titanium work-hardens if the tool rubs. Nickel alloys wear tools quickly and hold heat at the edge.
Published machining data for Inconel 718 indicates that carbide tool life falls sharply once cutting speed climbs above roughly 40 to 50 surface meters per minute. The practical response is lower speed, higher feed per tooth, and coolant directed at the flank. Five-axis tool orientation supports this by keeping the engagement angle stable.
For titanium, high-pressure coolant through the spindle outperforms flood coolant on deep cavities. The pressure clears chips and cools the edge. On thin walls, a tilted ball nose cutter spreads the cutting force and reduces deflection.
Therefore, the process plan must match the alloy. A program that works on aluminum will fail on Inconel. The machine does not change the metallurgy.
Expert Fabrication Versus Routine Milling
Routine milling rewards cycle time. Expert fabrication rewards first-article success. The priorities invert.
On a routine job, the program is stable and the setup is fixed. On an expert custom job, the program is new and the setup is built from scratch. Simulation, fixture design, and inspection planning take a larger share of the effort.
Shops that succeed at this level build a repeatable planning process. They do not rely on operator skill alone. They use simulation, checklists, and first-article measurement as standard steps.
For teams building that capability, cnc milling 5 axis is the platform that makes complex aerospace geometry practical, repeatable, and inspection-ready.
Frequently Asked Questions
Can 5-axis CNC milling hold tight tolerances on custom aerospace parts?
Yes, for well-supported features. Typical achievable tolerances run from ±0.005 mm to ±0.02 mm depending on material and geometry. Thin walls and deep cavities widen the range. Fixturing and toolpath strategy often matter more than machine specification.
What is the difference between 3+2 and simultaneous 5-axis for aerospace fabrication?
3+2 positions the part at a fixed angle and cuts with three axes. It suits angled holes and flat faces. Simultaneous five-axis moves all axes together. It suits twisted blades, curved slots, and continuous contours. Most aerospace jobs use both strategies on the same part.
How many setups can five-axis machining eliminate on a custom aerospace part?
It depends on geometry. A housing with angled ports on four faces may drop from five setups to two. A complex combustor part may drop from seven to three. The savings come from reaching multiple faces without re-fixturing.
What materials are hardest to machine in aerospace five-axis work?
Nickel-based superalloys and titanium alloys are the most demanding. They generate high heat, wear tools quickly, and can deflect thin sections. Proper tool selection and coolant delivery are critical.
How do I choose a machine style for expert five-axis aerospace milling?
Trunnion machines suit smaller, denser parts with good access. Gantry machines handle long structural parts. The choice depends on part size, weight, and spindle reach. Custom work benefits from easy fixture access and strong simulation support.
Final Checklist: Before Cutting an Expert Aerospace Part
- ☐ Feature map completed with axis strategy for each face
- ☐ Datum plan verified against drawing and assembly requirements
- ☐ Fixture designed for light clamping and full support
- ☐ Actual stock envelope measured and loaded into CAM
- ☐ Full machine simulation run with real holder and fixture
- ☐ Rotary axes calibrated and verified
- ☐ Coolant pressure and direction matched to the alloy
- ☐ First-article inspection plan includes all critical features
- ☐ Program locked with revision number after first-article pass
- ☐ Operator briefed on clearance risks and clamping limits