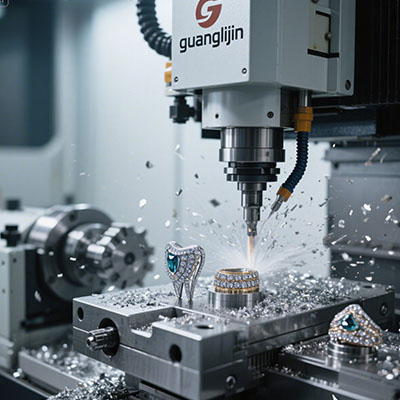
A machine can be accurate and still produce bad parts. The missing link is often fixturing. A fixture that flexes or slips turns a precise axis into a source of scrap. Yet most buyers spend hours on axis specifications and minutes on how the part will be held. This guide corrects that imbalance. We provide a practical cnc axis explained through the lens of precision fixturing, and show how to source an aerospace-ready fixture kit that protects your tolerance.
How Fixturing Interacts With Axis Motion
Each axis moves the tool or the workpiece. A fixture holds the workpiece in place. When the fixture is rigid, the axis moves as programmed. When the fixture flexes, the part moves too, and the cut lands somewhere else.
Rotary axes amplify this problem. As the A, B, or C axis rotates, cutting force changes direction. A fixture that held a flat part may deflect under a tilted cut. The resulting error appears as taper, chatter, or position drift.
Therefore axis accuracy and fixture rigidity must be evaluated together. A precise machine with a weak fixture produces imprecise parts. A modest machine with a rigid fixture often outperforms it.
Our team reviewed an aerospace bracket program in 2025 where the machine held ±0.001 inch on a test bar. Production parts failed true position. The cause was a tombstone fixture that flexed under a tilted cut. The axis was fine. The setup was not.
Project A vs Project B: Fixture Strategy Comparison
Two aerospace shops ran similar five-axis work. Project A built fixtures in-house from standard stock. Project B sourced a purpose-built aerospace fixture kit. Their results and total costs diverged.
| Factor | Project A — In-House Fixtures | Project B — Aerospace Fixture Kit |
|---|---|---|
| Initial cost | Lower material cost | Higher, engineered system |
| Rigidity | Variable, depends on fabrication skill | Verified under load |
| Setup repeatability | Operator-dependent | Repeatable datum system |
| Axis error impact | Amplified by fixture flex | Minimized by rigid clamping |
| Changeover time | Longer, custom each time | Faster with modular elements |
| Best fit | One-off prototypes | Production aerospace components |
Project A saved on fixture cost and lost on rework. Project B paid more upfront and held tolerance through production. However, Project B is not automatically correct for every shop. A prototype operation with frequent design changes may prefer in-house flexibility. The comparison forces a practical question: how much does a rejected lot cost your schedule?
Five Steps to Source a Precision Aerospace Fixture Kit
Do not treat fixturing as an afterthought. Do not accept a fixture that has not been checked under load. Run this sequence before committing to a setup.
Step 1: Map the Cutting Forces Across All Axes
Review your toolpaths. Identify where the rotary axes tilt and where cutting force changes direction. A fixture that suits a flat pocket may fail on an angled cut. Document the force directions before selecting clamps or vacuum zones. This map becomes the specification for the kit.
Step 2: Verify Fixture Rigidity Under Simulated Load
Mount the fixture and apply a known load with a dial indicator on the part datum. Measure deflection. A rigid fixture holds within a few microns. A flexible fixture shows visible movement. Document the result. A fixture that flexes under load will amplify every axis error .
Step 3: Confirm Repeatable Datum and Probing Strategy
Ask how the fixture establishes datum. A repeatable datum system lets the probe locate the part consistently. Confirm the probing routine matches the fixture design. Without this, operators guess offsets and scrap expensive material.
Step 4: Select Modular or Dedicated Elements Based on Volume
High-volume aerospace work favors dedicated fixtures with verified rigidity. High-mix work favors modular systems that change over quickly. Match the kit type to your production profile. A dedicated fixture on a low-volume part wastes capital. A modular system on a high-volume part may lack rigidity.
Step 5: Audit the Kit Supply Chain and Spares
Ask where the fixture components ship from and what the lead time is for replacement clamps, pads, and locating pins. A kit without spare access becomes a bottleneck. Confirm the supplier stocks wear items and provides setup documentation .
Common Mistakes in Aerospace Fixturing
⚠Attention: Do not evaluate axis accuracy in isolation from fixture rigidity. A precise machine with a weak fixture produces imprecise parts. Test the fixture under load.
⚠Attention: Do not use a tombstone or fixture designed for flat work on tilted five-axis cuts. Cutting force direction changes with axis motion. A fixture that held a flat part may flex on an angled cut.
⚠Attention: Never skip the datum repeatability check. A fixture that locates differently each time forces operators to guess offsets. Confirm the probe routine matches the fixture design.
Another quiet error involves clamp placement. Clamps that sit far from the cutting zone allow part vibration. Clamps that sit over the cutting zone interfere with the toolpath. Plan clamp locations around the actual toolpaths, not just the part outline.
Frequently Asked Questions
How does fixturing relate to CNC axis accuracy?
Axis accuracy assumes the part stays still. A flexible fixture lets the part move during cutting, so the axis error compounds. Rigid fixturing protects the accuracy the machine delivers .
What is an aerospace fixture kit?
It is a set of clamps, locating elements, and base plates designed for repeatable aerospace setups. Purpose-built kits offer verified rigidity and repeatable datum. Modular kits offer faster changeover for high-mix work .
How do I test fixture rigidity before production?
Mount the fixture and apply a known load with a dial indicator on the part datum. Measure deflection. A rigid fixture holds within a few microns. Document the result before running production parts.
When should I use modular versus dedicated fixtures?
High-volume work favors dedicated fixtures for rigidity. High-mix work favors modular systems for faster changeover. Match the fixture type to your production profile and part tolerances .
How much does an aerospace fixture kit cost?
Modular systems range from a few thousand dollars to tens of thousands depending on size and precision. Dedicated fixtures cost more upfront but deliver higher rigidity. Factor rework risk into the total cost.
Pre-Purchase Checklist
- ☐ Toolpath force map documented across all axes
- ☐ Fixture rigidity tested under simulated load
- ☐ Deflection measured at the part datum
- ☐ Repeatable datum system confirmed
- ☐ Probing routine matches fixture design
- ☐ Modular vs dedicated choice matched to volume
- ☐ Clamp locations planned around actual toolpaths
- ☐ Fixture material suited to alloy and cutting loads
- ☐ Spare clamps, pads, and locating pins available
- ☐ Setup documentation provided with kit
- ☐ Changeover time estimated for high-mix work
- ☐ Operator training covers datum and probe routine
Precision fixturing is the bridge between axis accuracy and part accuracy. Start with your force map, survive a rigidity test, and end with a checklist on the floor. Everything else is brochure noise.